Friday, 26 April 2013

Evaluation Part 2


How does my film trailer use and/or challenge the conventions of existing films trailers?

During the making of my trailer I tried to choose mise-en-scene which fitted the characters. This meant shirts, ties where possible and plain coats or a leather jacket where it suited, for characters outdoors. I also used other mise-en-scene such as a shot of alcohol, and revolver and various office equipment to get across what the characters are.

The shots I have used are mostly done to introduce mystery, a sense of confusion and lack of direction. A lot of them are meant to represent the mind of the main character who is facing a case he is struggling to solve. I feel this suits the mystery of what a film trailer is to some extent.

Some audience feedback


This supports my early thoughts that this music may appeal to more of a male audience. It has action and mostly male roles within it which is stereotypical of what men may look for in a movie. Making the trailer again and increasing the amount of factors which could attract both a male and female audience may be a good idea. 

This is over 50% which is good however people may have questioned the quality of the trailer and whether it was really up to standards. I would find these fair judgement as it wasn't as refined as it should of been and the trailer was a little 'low budget' in places.


This shows that I may need to include more signs, maybe in mise-en-scene? that this is a detective genre movie. While some are in there more would cement the genre for what it is.

I feel this is a reasonable judgement as the trailers and magazine feature the characters in the same of at least similar clothes to what they wore in the trailer. One of the posters also includes similar architecture to the trailer. The colours on the posters aren't really anywhere in the trailer which may be what lowers the recognition.


What I would do differently

The film trailer was finished and edited in a relatively short time. If I was to do the film trailer again I would of make sure I had more time to do it so it was of a better quality. I would also have thought the story through more to make it better and more fitting of the genre. overall for the time it was done in I feel it is an okay trailer but I would rather it were better.

Evaluation


This is the opening shot of my film trailer. It establishes the film taking place ina fairly urban, built up enviroment. This shot was taken from my window which has a view of packed together houses, back yards and various vehichles. I felt it made an acceptable opening for my trailer. To film this I had to use a camera without a tripod as getting into position with a tripod was impossible. To make sure the shot was as not shakey as possible I slowed it down so that shake was less noticable and held the camera as still as possible.
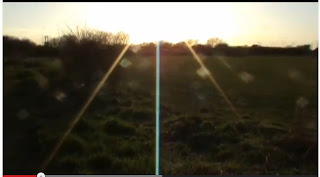

The second shot was of the camera panning up at the sun over a field. The shot coincides with a relevant line in the trailer which is why I included the shot. It could also be taken metaphorically with the sun rising at the beginning which says the sun rise is the start of the story. To get this shot I originally panned down from the sun then changed my mind on what I wanted afterwards and chose to reverse the footage and slow it down so it went into it. I felt this made the line more relevant. 


These two shots are teaser content for what will happen  in the rest of the film showing a murder and a bloody knife in a sink. It has an audience asking who and how and is a way to grip them and make them want to see more. To get the blood on the hands I mixed various different colours of paint until I got the colour I felt best represented blood then watered it down and spread it over my hands and a knife. I then had someone else film it from a top down angle.


This is a second establishing shot showing where other action in the movie will take place.I pan down into it to suggest we are literally being 'dropped into' the story. I introduce the characters of the movie here.


The next couple of shots are MCU's of some of the main characters who are being introduced into the film. This would generally attract an audience for seeing who is in the film if they recognized them but also show them who the story will be focused on. I chose MCU shots because it focused on the character whilst still showing they are in the area of the previous establishing shot.


This shot is the involved characters entering an office for a scene and one of the longer sections of the trailer. It begins introducing the characters a little but not completely opening them up.


This shot shows the villain of the movie pacing contemplating recent events. It begins to hint at his true nature which is further suggested in the following scene. To do the pacing scene I had to slow down the footage as the original was to fast. I also made this scene in credibly short so some people may miss his intentions at first and see it as any other shot.


This is the following shot which further confirms the main villains plans and introduces his accomplice in the movie. It shows them having a suspicious conversation in shot reverse shot asking evidence to be destroyed.


The following scenes are a sort of research montage and as such have imagery likely associated with an office. I filmed me typing and chose a segment which looked most natural. The lighting I feel emphasizes that the character has been at what he has doing for a long time. 


This shot had the previous computer screen in the background to suggest the stuff in front is what is being researched. I followed this up by putting in close ups of key words which link with the case. To create this shot I lowered the opacity of the research shots and put them over the computer screen.


The same thing was done with these shots with different imagery being used as I included a glass of alcohol being poured in the background possibly showing the stress of the case getting to the character.


This is a shot of a phone receiving a message with information relating to a case. I simply asked someone to send me a message while renaming their name in my phone. I also attempted zooming for dramatic effect.  


This shows a reaction to the text of one of the characters revealing a gun at their side. It is a revolver, a small gun often used by the police or detectives and is easy to acquire. The shot I feel is suitable as a reaction showing the build up of suspicion in the case.


These shots involve a confrontation between two of the characters. It shows how tensions will build in the film nearing on violence. To achieve this shot I moved the camera from various positions to get different angles of the build up to and the confrontation itself. By doing this I have made it look as smooth as possible.


This part of the film trailer speeds up and contains the most action. It shows the two villains, almost arrogantly walking around a corner and then a chase scene between two of the other characters down a previously shown location. It also shows the chaos which has ensued due to the case possibly making an audience want to know more about it.
The chase was done looking in two different directions down the street which could make it seem longer than it actually is without dragging the trailer down with its length.


They're two review shots like this in the trailer in bold white writing which are used in most trailers to give more incentive to see the film.


This shot was done in a phone box and was me trying to recreate elements you might see. This shot also possibly introduces an anonymous character, a further way to grip an audience.


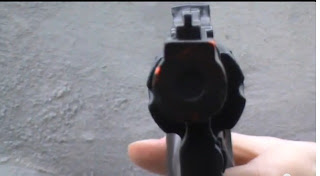
This shot is a close up on a gun barrel and is the final shot of the trailer. It makes the audience ask who, if anyone, will be shot. I tried to put as many questions in as possible that will make the audience want more.


Wednesday, 20 March 2013

Uncut Edited

I have added the main actor onto the magazine as the main image and made some of the text clearer. I plan on enlarging and/or replacing some of the other text to make it clearer and also darkening the background.


On these two magazine covers I have added different lighting effects to the background specifically linear light and pin light which give different shades to the blue of the background and also emphasis the cloud shapes in the background giving the cover more texture.

Early Uncut Concept (magazine)


This was an early try at a film magazine cover however after coming back to it I feel it is to bright and to much is going on. I will likely use some of the layout I have used but may change the font and some of the colours.

Film Poster more background

Experimenting with adding buildings to the background of the film poster, plan on experimenting with different effects so everything doesn't merge into one.


Subtract effect added, gives a darker looking background, makes people more of the focus of attention.

Edited Film Poster


I have added gradient effects to the background of the film poster which darkens the poster and gives it a more serious feel. It also makes the images of the people stand out more.
I played two new gradients over the background and experimented with different opacity.

Thursday, 14 March 2013

Film Poster Title area complete


I have added most of the information at the bottom of my film poster all it needs adding now is the imagery and methods to be used to blend them into the poster more naturally. I have added the information of the crew who worked on the film at the bottom of the poster as I have found that this is a common convention with many film trailers. I have used mostly fictional names but have included the actors names and those of the director. I have also added a website and a date to the film trailer which is other common info found. The colours used for the text are mainly white or grayish colours which make it easy to read on the blue background.

Wednesday, 13 March 2013

Film Poster Background


This is the background I have created for my films poster. It was done using some of the material used to make the background of my film magazine, using different parts taken from a cloudy sky I have just changed the composition.

To make the image look smoother and less obvious of where different images of clouds have been cut together I have used the gradient tool over the top of the original image with a dark blue colour which looks good along with the clouds. I have then turned the opacity down on the gradient layer so the shapes and texture of the clouds show through in a darker colour.

Wednesday, 6 February 2013

Font Effects experiments


These are different effects done to the title using Photoshop. A combination of all three may actually work as I feel each of the effects has its own strengths but look a bit dull on their own. On the other hand all three effects together may look a bit overpowering. What is important is that the title of the magazine stands out and is bold which all 3 experiments achieve. As a stand alone I feel the bottom experiment with the bevel and emboss along with the glow effects looks best as the added brightness from the glow makes it stand out more on a page.

Also, depending on the colour of the background I may choose to use white text rather than red.


Font Experiments for Magazine

These are some early experiments with which font I will use on the cover of my film magazine. Most film magazines use large bold text on their cover so I have focused on similar looking text.
 I think the first or second option would look best however I will likely experiment with all of them to see how each looks on the final product.